Active Directory network deployment
To deploy IE URL Lock with ActiveDirectory, follow these general guidelines. These instructions presently assume that you have installed the Microsoft Group Policy Management Console, which makes group policy management easier.
Create a computer group for those computers that you want to install IE URL Lock onto
For maximum convenience, it's possible to create a group of computers in the ActiveDirectory. Note that this is optional, but it can greatly simply administration if you want to restrict access on the shared folder containing the installation MSI file to only those computers that need to install IE URL Lock. To do this, follow these steps:
- Open the "Active Directory Users and Computers" program from the "Administrative Tools" folder
- In your domain's "Computers" folder, right-click on "Computers" and select "New" -> "Group"
- Give this group a meaningful name such as "IE URL Lock Computers"
- Right-click on the newly created group and select "Properties"
- Click on the "Members" tab
- Add the computers that you want to install IE URL Lock onto
With a group in place and the package properly configured in ActiveDirectory, adding computers to this group will automatically install IE URL Lock on them when they reboot, and removing computers will automatically uninstall IE URL Lock from them when they reboot.
If you have not already done so, you will need to create a shared folder that contains the IE URL Lock MSI file so that computers that you want to install IE URL Lock onto can download and install it. You will need to ensure that the permissions are proper on both the share and on the folder within the NTFS filesystem.
At a minimum, the computers that you want to install IE URL Lock onto will need read-only access to this folder. If you created an IE URL Lock Computers group, this task is simplified by giving read-only access to that group on both the share and NTFS permission levels. To ensure that the permissions are restrictive, grant full NTFS folder and share access to only the Administrators group and give the IE URL Lock Computers group read-only access on both the NTFS folder and share levels. Remove access from all others on both the share and on the NTFS folder permissions.
Create or reuse a computer-based installation policy
IE URL Lock installs best when it's included in a computer policy. At this time, limitations of the current installer are preventing group and user installation policies from installing and uninstalling IE URL Lock properly. Workarounds are available, but are complex. For now, computer policies are the preferred way to deploy IE URL Lock. Note that it is easy to disable IE URL Lock with a group or user policy so that, as an example, administrators can have IE URL Lock disabled when they log on.
Create a new computer-based installation policy
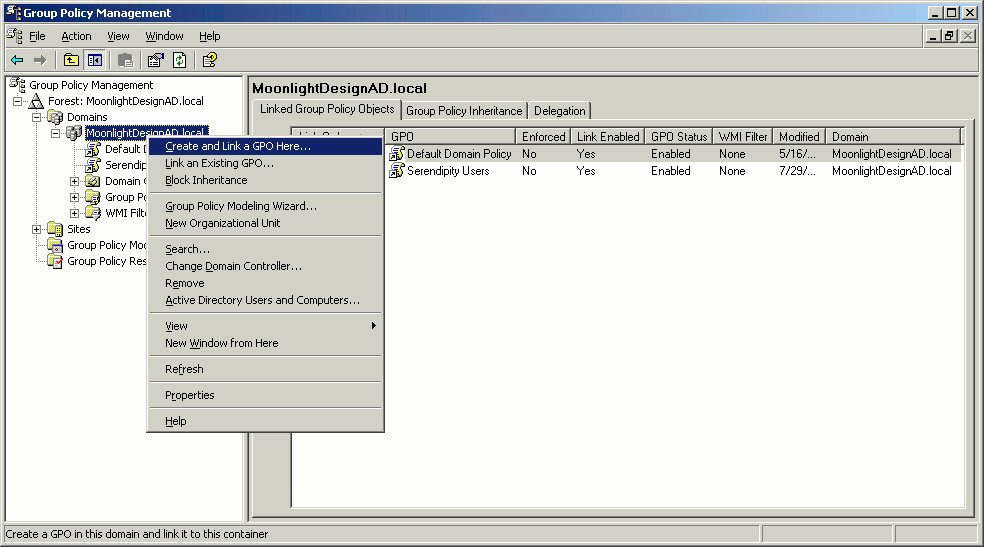
- Start the Microsoft Group Policy Management Console, which is listed in the "Administrative Tools" as "Group Policy Management"
- Right-click on the domain that you want to add the policy to and select "Create and Link GPO Here." Give your new group policy object a name, such as "IE URL Lock"
- Click on the newly created group policy object
- In the "Security Filtering" section for this newly created group policy object, click on the "Add..." button. If you created a group for the IE URL Lock computers, then add that group of computers. If you want to add computers individually here, then add those computers now
- Remove "Authenticated Users" from the "Security Filtering" section if it was automatically added. We want this policy to apply only to computers
- After adding the computers or group(s) of computers, right-click on your new GPO and select "Edit..." from the right-click menu
- Jump to the section below entitled "Adding the installation information to the group policy"

Reuse an existing computer-based policy
- Start the Microsoft Group Policy Management Console, which is listed in the "Administrative Tools" as "Group Policy Management"
- Right-click on the GPO that you want to use and select "Edit..." from the right-click menu. Be sure that this is a policy that is applied to computers instead of groups or users
- Jump to the section below entitled "Adding the installation information to the group policy"
Adding the installation information to the group policy
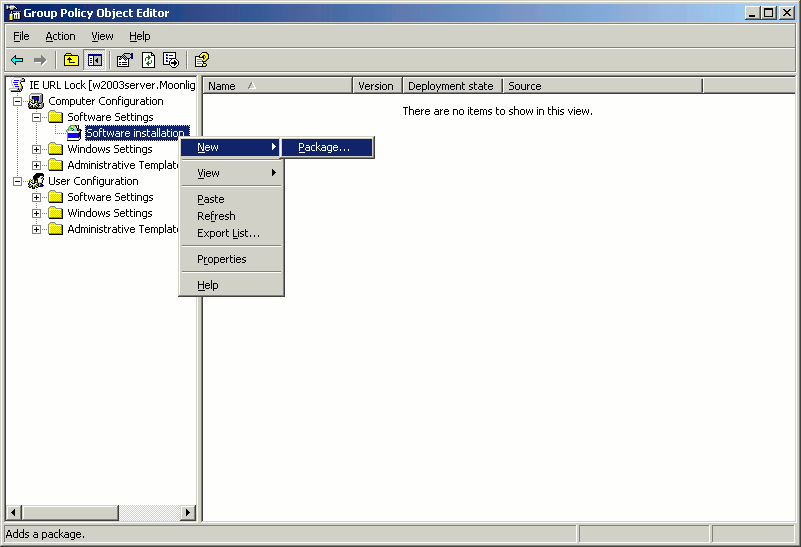
- In the Group Policy Object Editor window, open "Computer Configuration" -> "Software Settings" -> "Software installation"
- Right-click on "Software installation" and select "New" -> "Package..."
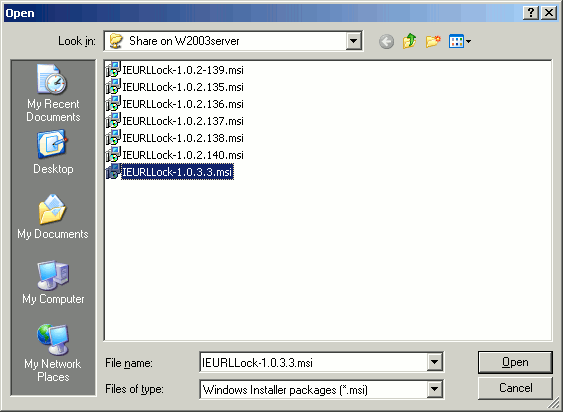
- Navigate to the shared folder that contains the IE URL Lock installation MSI package file through the network path and select the IE URL Lock MSI package file. Don't use the local path; workstations will be unable to install the MSI if you do that. Windows will warn you if you try to use the local path. In my example, I navigated to \\W2003server\Share
- When asked for the deployment type, you can select either "Assigned" or "Advanced." The difference is that the latter will open up the properties window automatically for you. If you selected "Advanced," then you can right-click on the newly-added package and select "Properties" to proceed to the next step
- Important: Click on the "Deployment" tab and select the "Uninstall this application when it falls out of the scope of management" to enable automatic uninstallation when you remove computers from this policy either directly or via a group of computers. Press the OK button to save these changes
- IE URL Lock will now install automatically onto computers that this policy applies to after they are restarted


Create or reuse a configuration policy
Depending on your needs, you can configure IE URL Lock using computer, group, or user policies. Most administrators will likely want to use group policies to configure IE URL Lock to give different user groups different levels of access to Internet Explorer.
Read the ActiveDirectory configuration page for more information.